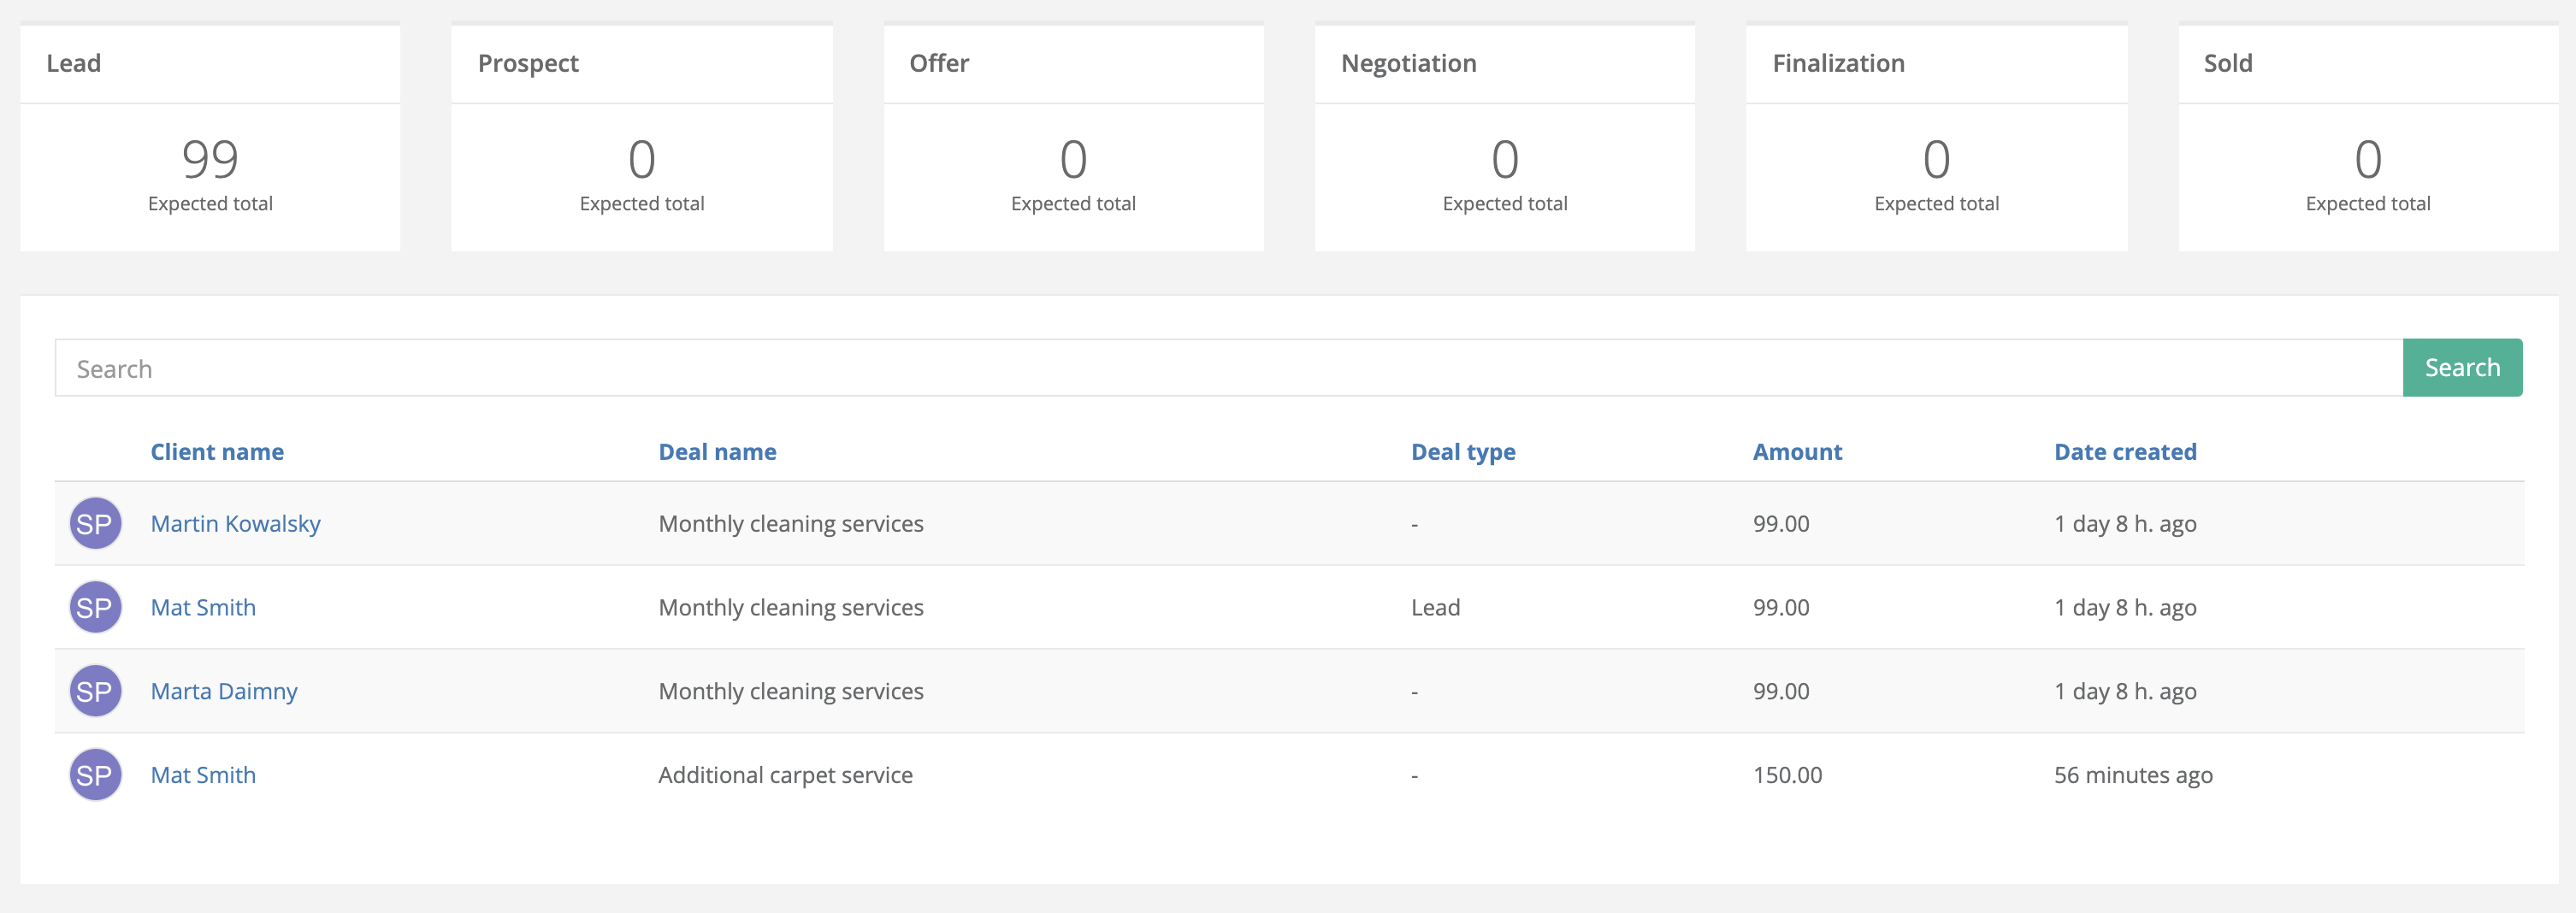
Sales are strongly connected with clients. We understand that that's why the sales module is one of the most easy and powerful features in the client list system. With the use of the sales module, you're able to track information about offers you send to clients, prospects, lead, sales and all the things that are happening in between. It's simple you add there all the things you offer to clients and change the status when the client decides to buy the product or service. You will find sales module here:

To add a sale or offer click the "Add sale/offer" button. You can add as many offers as you want. You can also add sale from a list with the use of a quick action bar:

First thing you need to do when adding a sales is to define a name, and offered price and a type of the offer
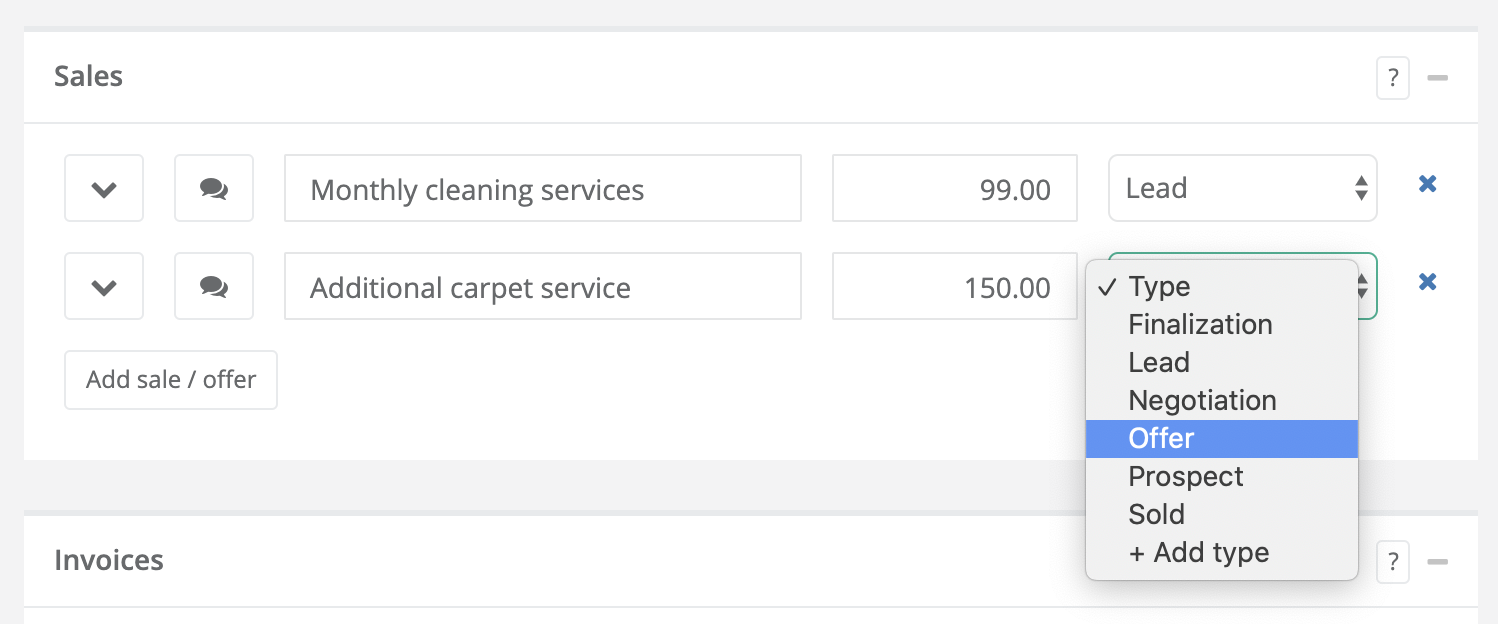
Types can be easily managed, you can develop your own steps in a sales funnel. To manage that check the settings of a list. We added here a simple "Add type" button so you can add your own status on the fly.
When you add a record you now start to track information about potential/ongoing or closed sales and this can be that simple! But wait for a second! we added here some features that can improve the process
Feature 1: Comments and discussion
Every sale can be as simple as a name, but usually, the offer is much more sophisticated, before we go deeper in that let us show you how simply have a discussion about the offer. You can put their details of the sale or start a discussion about the terms with your business partners. Click here to start the discussion:
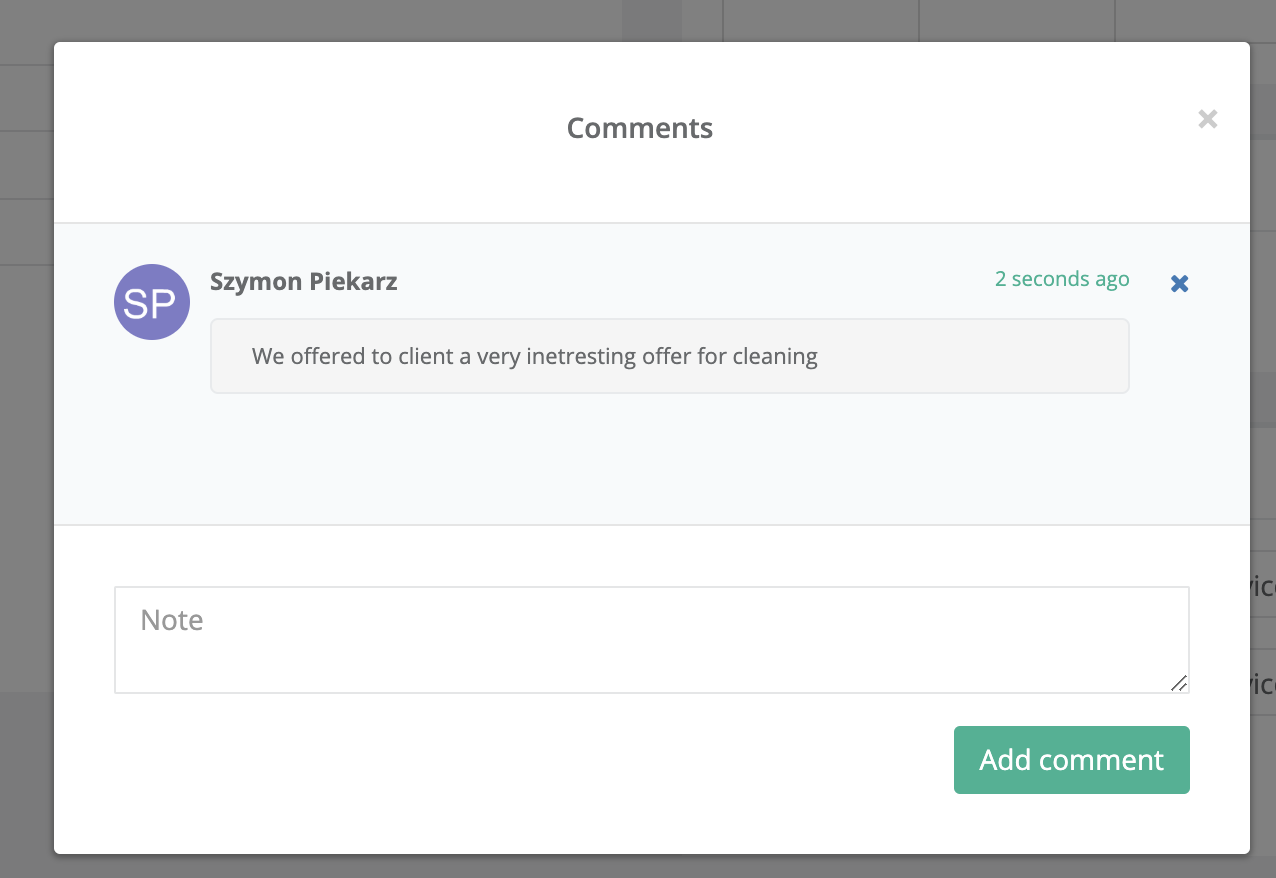
The window appears where you can add comments:
When there are some comments and messages from others you will see that next to a sale record:
Feature 2: Assignment
When you want to improve your sales process you can click a menu button next to a sales record. When you open a sale record you will see the extra options that can be connected with a sale
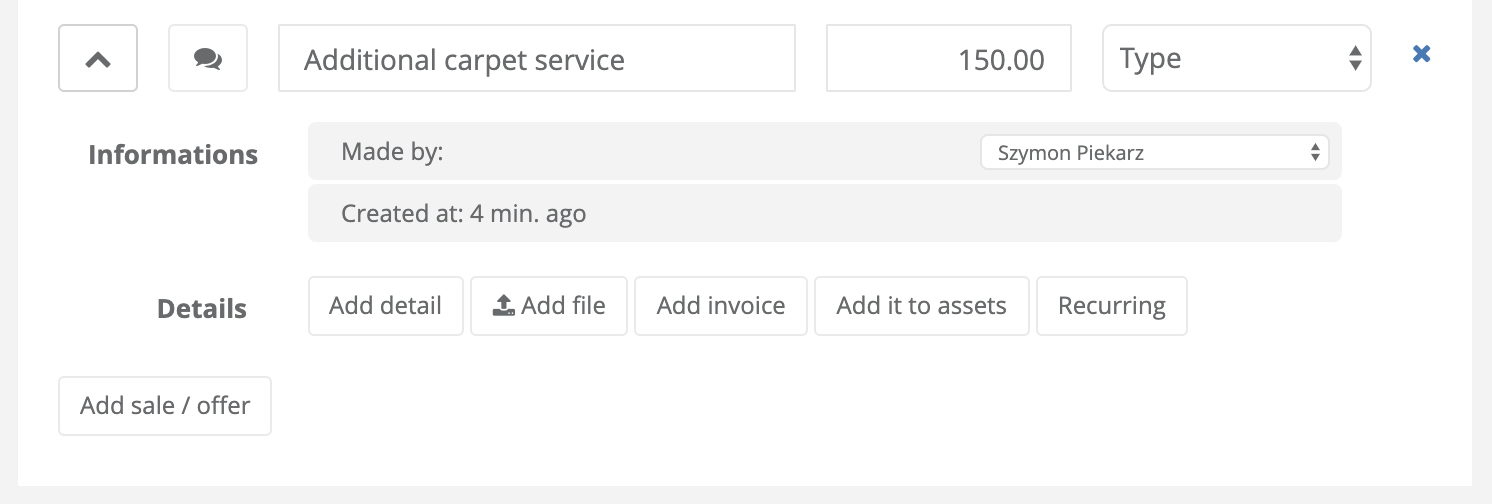
The first thing you will see is the assignment of a sale. If you work with your people you can see who added and when it's necessary you can replace the user/employee with the right person responsible for all the sales processes within that product or service. When you do that this person will be visible as a responsible person in all reports and summaries. This person also will receive notifications about all the deadlines and problems.
Feature 3: Details/Tasks
So the sale is a process, and you need to have a plan of attack. To help you manage it we developed a details/task option that is attached to every sale. Simply click Add detail. You will see a new record that will appear on a screen. Add here the name of a task/detail of the transaction you want to complete. It will look like that:

It's a list of details you can put or tasks with specific dates you want to handle. It's up to you how you develop it. This can be a simple list of things you need to do that you want to tick like that:

You can treat it as a task with a deadline by clicking a clock button next to a task and set the date:

When you're using a deadline option of a sales task, you will be notified 7, 3 and 24 hours before the deadline on email. Only the assigned person will be notified
Feature 4: Files
By clicking add files you're able to add specific files to a sale. This can be uploaded offer a specification or a report or documents provided by clients

Feature 5: Generate an invoice
You can generate invoice attached to this sales record by clicking "Add invoice"
Feature 6: Convert to asset
So when you're offering something to a client you can't be sure that he will buy it, because it can be an offer. But when the client decides to acquire the product or service you can click a button "Add it to assets" to save information that the client owns the service or product. The sale record will be copied to assets module when you can simply track "What does client has, what kind of service or product". For example, you send an offer to buy a car, and when the client acquires a car it's his asset. So later you will know that a client who contacts you has this kind of car
The added sales to assets will look like that:
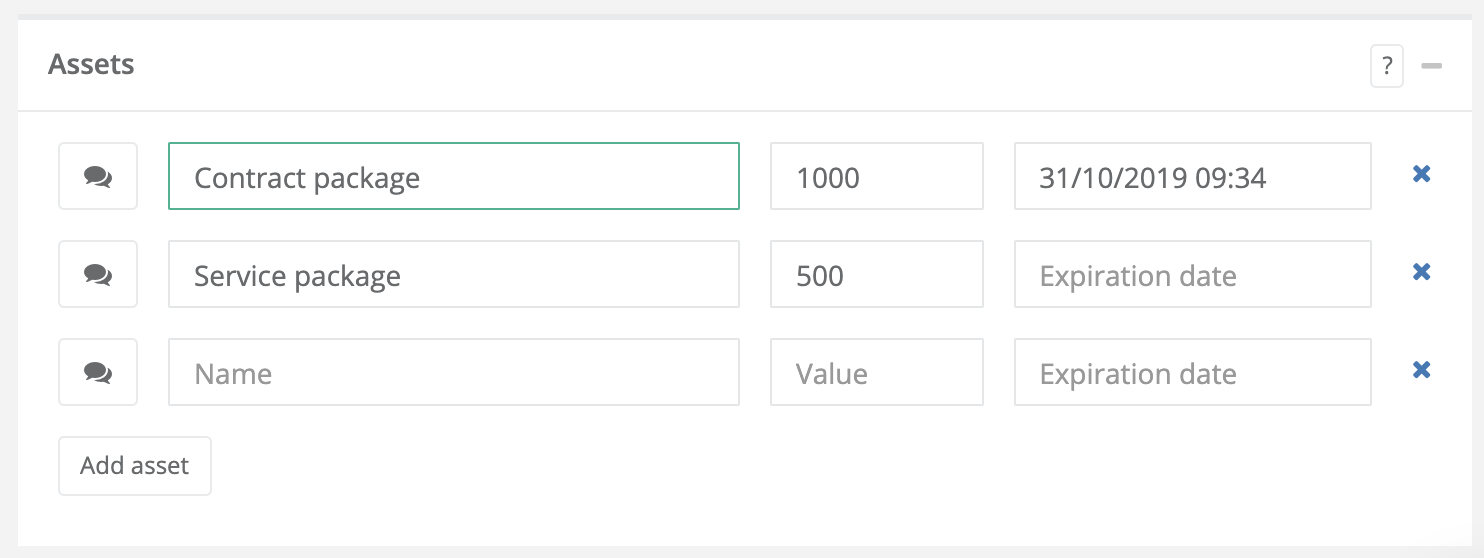
Feature 7: Recurring product
If you're offering a recurring product to your clients. For example, you offer a cleaning service with a monthly plan, or you want to send client an invoice for the same service every month. With this option you can do that:
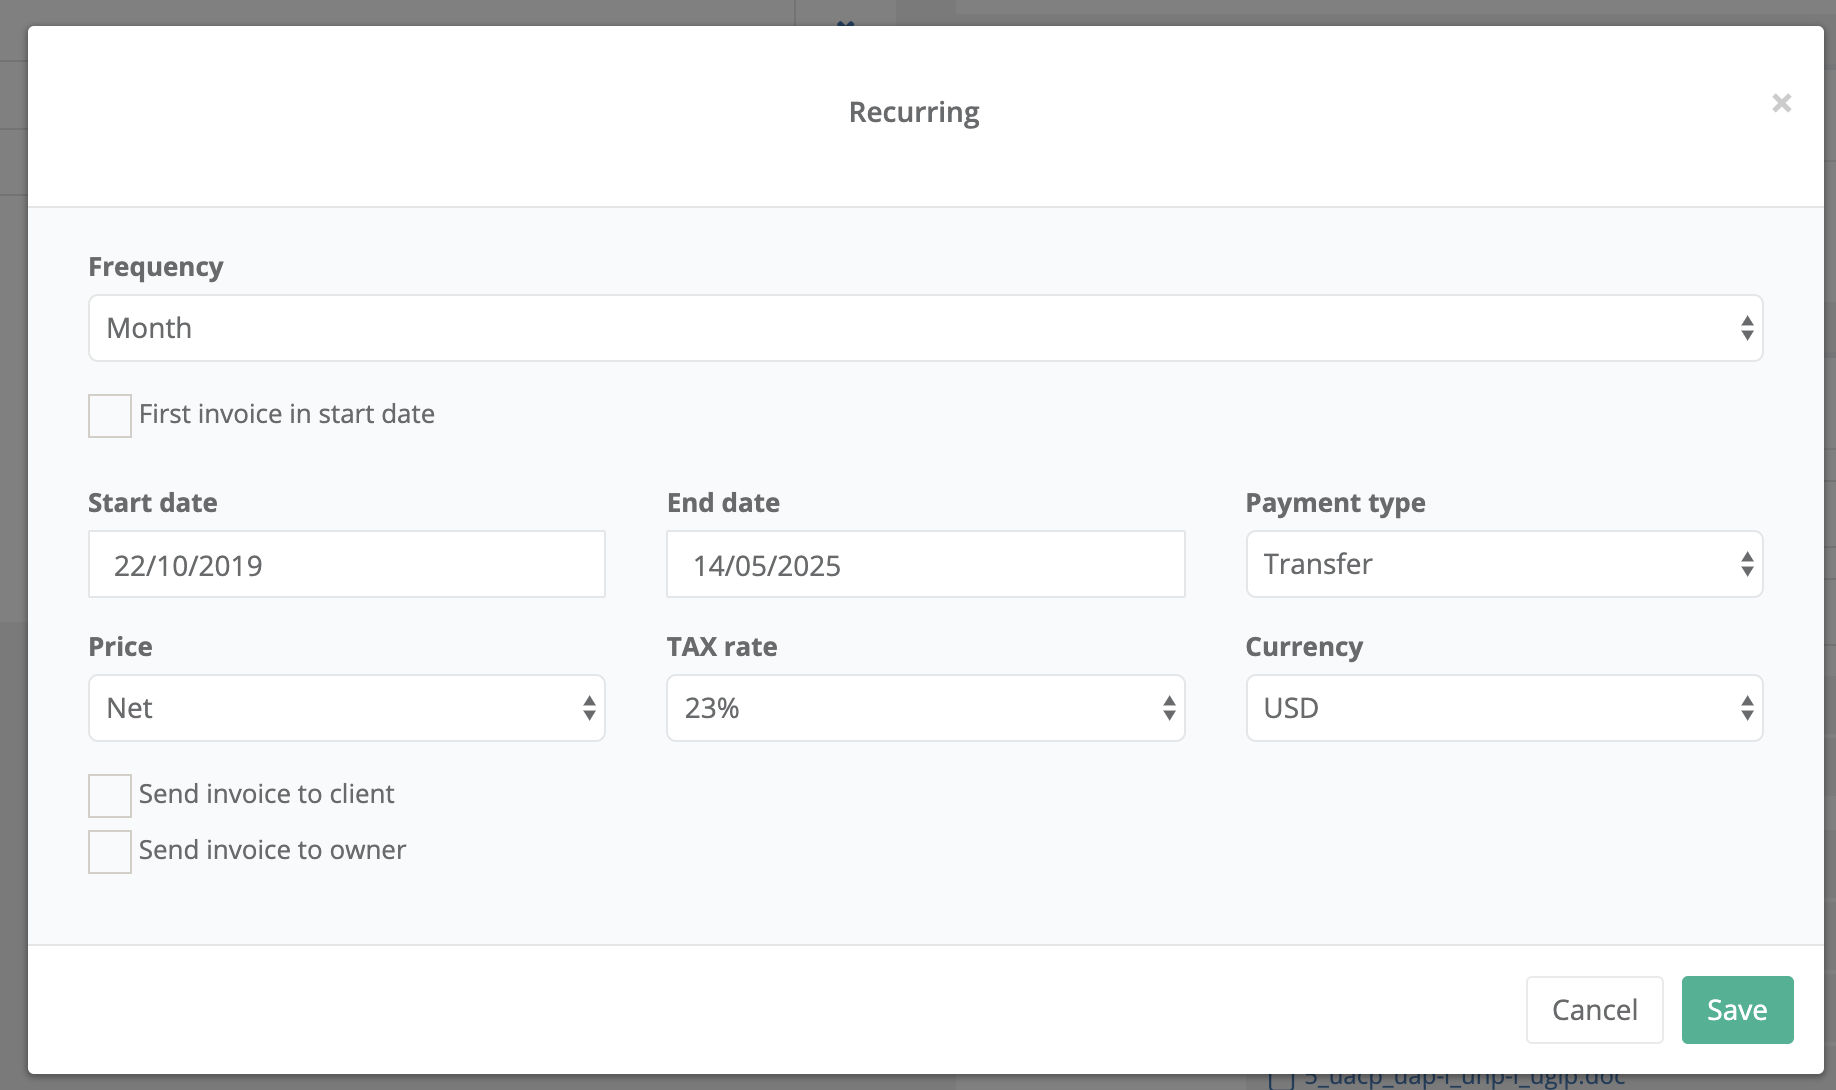
You set the frequency of the recurring mode. That means that this option will be triggered in a day, week, month or year. Next you set the start and end date and all the things that are important for sales reason. The price will be taken from a price you entered in a sales record (next to a name). When you set that up, the system will generate invoices from this sales record:
if you select monthly recurring - the invoice will be generated every month
if you select weekly recurring - the invoice will be generated every week
You choose how it works. It's important to understand that you have important options that can automate the process:
Check "The first invoice in start date", if you want to start invoicing people from a specific date,
Check "Send invoice to client", if you want to send an invoice to a client so he can pay you
Check "Send an invoice to owner", if you want to send the invoice to an owner of this sales task, so he can send it to clients
Sales summary
You're adding all the sales to clients on your list. To help you create a sales funnel from those data we developed the summary functionality which you can find by clicking this button:
When you enter the summary screen you will find a generated report with a sales funnel of all client sales:
